So, I mentioned something about Regency costume a while back. Said project is now Officially Underway and the first piece is finished.
When creating an entire historical costume from scratch, one must begin by making the underthings. This is because they are often designed to change the body's shape, and they often (especially for women) consist of a few layers of fabric. The result can be a very different set of measurements from your natural shape. Therefore, it's important to make the undergarments first, then take a new set of measurements while wearing everything that's going to be worn underneath your gown.
In light of this rule, I started with the chemise.
It's made out of 100% cotton lawn, which is a fine, lightweight fabric. It's a very simple shape, long and loose and flaring only slightly at the hem.
It has a simple drawstring fastening at the neckline; I've used thin white ribbon to gather it up.
It has a large gusset under the arm (the diamond-shaped fabric insert) to allow for freedom of movement. The rest of the sleeve is merely a rectangle of fabric.
I gather that the common length for a Regency chemise is about calf-length. I lengthened mine by a few inches.
All of the seams are fully enclosed, which makes it a strong, long-wearing garment. If you imagine how harsh the process of washing was during the nineteenth century, it would need to be!
By way of interest and comparison, here are a couple of other historical shifts and chemises I have in my possession:
I made this chemise a year or so ago to wear underneath a late nineteenth-century aesthetic gown. It's made of medium-weight cotton - heavier and thicker than the cotton lawn. It has fully-shaped sleeves and, instead of a drawstring neckline, it buttons closed. There are long inserts from hem to waist adding space in the skirt area. This one is a bit prettier than my Regency chemise, having some trim around the neckline. I could have trimmed the Regency as well, but I like it plain and simple.
This is an eighteenth-century style shift (the terms change, by the way, from shift to chemise but essentially they refer to the same basic idea: a loose, plain garment worn closest to the skin). This one was made for me. It's made from medium-weight linen and it's the most voluminous of my collection. It has a drawstring neckline, like the Regency, but it has long sleeves (it's quite interesting fitting these under the tight sleeves of my eighteenth-century printed cotton gown!).
The next phase of production is the stays (stays were the forerunners of corsets: designed to cinch in certain parts of the anatomy and accentuate others). Regency clothes had some interesting variations in corsetry-style garments. There are two common styles: long stays, which do look like a sort of halfway point between eighteenth-century stays and nineteenth-century corsets, and short stays.
I'm making short stays. It's an interesting garment because it's probably the closest thing to a brassiere that's seen in costume before the twentieth century. I'm probably going to quilt them rather than bone them. (Notice my grammar's wavering a bit here. It's a single item of clothing most confusingly called 'stays', a plural term. Does one refer to it/them as it or them? Hmmm).
It's going to be a delicate, tricky job so it'll take some time before they're finished. In the meantime, I'm embarking on a range of gypsy/peasant blouses in honour of spring, and planning a post on this sometime soon!
Saturday, April 30, 2011
Saturday, April 9, 2011
Fun & Games in the Land of Regency Costume
So, I think I've maybe overdone it a bit lately. Maybe more than a bit. My shop'll probably wander along by itself at this point without my needing to be obsessing over it all day every day, and my novel finally feels like it's on track. It's past time I did something just for the fun of it.
I have for years been wanting to do a proper Regency costume project - undergarments, dress, spencer jacket, bonnet, reticule and all - and I can't understand why it's taken me so long to get around to it. So: I've taken this up as a holiday project for the next couple of months.
Course, even setting it up takes time and certainly money. I guess that's why I've postponed it. To start with, I need...
Patterns
I'd love to develop these myself, but I require a lot more specific historical knowledge to do that. So for the time being, I'll base my costume on someone else's. Get a look at these beauties:
I got these as a birthday gift courtesy of my costumier sister (thanks, Kate). They come from the brilliant website 'Sense & Sensibility Patterns', which I highly recommend for a range of costume interests, not just Regency. Here's the link http://sensibility.com/
Fabric
Expensive, this part, if one expects to use authentic fabrics - and of course, I do. By authentic I mean as close as possible to the original materials employed for garments like these back in the day. It's not always possible to get it spot on - for example, I'd love to use a pretty printed muslin for my day dress, but nobody manufactures fabrics like that anymore. Did you know that a lot of the fabrics used for period dramas like Pride & Prejudice had to be custom-made?
I expect it'll take me another week or two to find all the fabrics I need. After that, I'm starting out with the undergarments. I'll be blogging about it as I go, so visit again for the updates!
Friday, April 1, 2011
Velvet: How to care for it, how to work with it
Dear Velvet Lovers,
I have no hesitation in addressing you as such because who could resist velvet? It's absolutely the most lush, plush, luscious and beautiful fabric known to man.
Unfortunately this is one of those things that by its mere existence offers a challenge to the universe. As punishment (or justice) for being so obviously superior to every other fabric alive, Master Universe ensured that velvet is also about the most difficult fabric to sew with and to keep in good condition.
Fear not, however. It's not impossible. It's just damn tricky. Here are some bits and pieces I've learned about velvet, through years of stubbornly refusing to leave it alone.
How to Launder Velvet
'Velvet' is not just one fabric but a whole category of fabrics. To qualify as 'velvet' a fabric must have a woven base topped with closely packed, short, soft fibres (called the 'pile'). It's a bit more complicated than that but we'll leave it there. Now, these fibres can be made up of just about anything.
The cheapest grades of velvet are pure polyester. Most of these can stand being put through the washing machine, but I don't recommend washing them any hotter than about 30 degrees centigrade. If in doubt, hand wash.
Cotton velvet is, obviously enough, pure cotton. It's less soft and plush than some velvets, but it's sturdier. I don't recommend putting these through the washing machine at all. Dry cleaning is best.
Silk velvets are the most expensive. Usually they are not 100% silk: a common composition is about 30% silk to 70% viscose (rayon), or thereabouts. These should never be machine washed (it ruins the lie of the pile, so the colour will appear patchy. Like crushed velvet, but more chaotic). It's best to dry clean anything made out of silk velvet.
How to Dry Velvet
Simple rule here: never tumble dry.
It might be possible to make an exception for the cheaper grade stretch velvets, but it probably isn't worth it. Tumble dryers are pretty bad for all luxury fabrics. Hang your velvet garment up somewhere and let it dry naturally. Or, if you're pre-washing a length of velvet prior to sewing with it, hang it over a drying rack.
How to Store Velvet
Here, again, velvet shows its contrariness. It should not, cannot ever be ironed - and yet it's great at developing deep creases which are very hard to remove.
To avoid the creases developing, don't store it folded. If it is an uncut length of fabric, store it on a roll. If it is an article of clothing, hang it up in a wardrobe.
Keep it out of direct sunlight. This actually goes for all types of fabrics, especially the delicate ones. Sunlight fades colours over time (don't worry: it takes a long time in direct light for this to happen). Make sure that when you put it to bed, it goes to sleep somewhere dark.
How to Press Velvet
I know I said it can't be ironed, but it's not hopeless. While you should never touch the surface of your velvet with the hot plate of an iron, it can be steamed.
Hold your steam iron a couple of inches away from the surface of the pile and press the steam button. Repeat until the creases disappear. Be careful with this: don't let the velvet get too wet. If it gets soaked through, pause for a few minutes and then resume.
If all else fails, you can turn the velvet over and press the back. GENTLY. I've heard other seamstresses suggest laying a towel over the ironing board before you do this, to protect the pile. If you're trying this, choose a thick, soft, fluffy towel, not an old ratty one.
These policies should help keep your glorious velvets in top condition. For those of you who wear velvets but don't sew with them, that's the end of the relevant part of this post. Anybody who has plans to sew anything velvet anytime soon, read on...
The Problem With Sewing Velvet
... is that it has a mind of its own. No, really. Pin the stuff down as much as you like and it'll wriggle away. This is because, when you lay two pieces of velvet right sides together, the piles of the two pieces work against one another and create a slight shift sideways. When you put it under the sewing machine, you can end up with an uneven seam and a rapidly narrowing seam allowance.
How to resolve this? Well, one thing that helps is to remember that it can move in different directions. Just putting your pins in a straight line won't hold it; if you'll halted the shift lengthways it'll jump sideways. It can help to put the pins in at different angles.
If you're sewing with two small pieces - like sewing patchwork patches together - then pin all the seams, even if you're only sewing one.
Failing all of that, tack it. (Tacking is putting rough hand stitching in to hold your fabrics together while you machine stitch them). Usually it's fine to just use running stitch when tacking, but velvet needs more. If I'm sewing any larger pieces together I usually use a herringbone stitch (cross shapes). This takes extra time to do, but it can save time in the end, as you're much more likely to get it right first time.
Another problem with velvet is cutting it out in the first place. It's slippery and can twitch away from your scissors. This is especially true of silk velvet. I usually counter this by cutting a couple of millimetres outside of the pattern line. If it's stretched or moved, this can cancel out the problem. You can tidy up any slight unevenness after you remove the pattern piece.
So: it might be hard work, sometimes, but it's worth the pain because the results can look spectacular - especially if you use a decent quality piece of velvet. Here's my most recent creation, made from a high grade polyester variant:
Thursday, March 24, 2011
The Truth About Snow White
This is the first of a series of fairy tales, fancifully retold and illustrated with some of the best things I've found on Etsy recently. Each post will feature several gorgeous items, and you'll find the links to the corresponding Etsy shops in the text and collected at the end of the page.
To begin with.... The Truth About Snow White.
***-----------------------------------------------------------------------------------------------------***
Once Upon a Time there was a fair and beauteous land, ruled over by a fair and beauteous Wicked Queen. Nobody loved this damsel so well as she loved herself, and her only companion was her Magic Mirror.
It happened one day that the Wicked Queen had a new hat. It was a remarkable piece: as black as ebony and as shadowy as the night, its unique style was perfectly suited to the display of her particular personal qualities.
Thus arrayed, she presented herself before the Mirror and tapped lightly on the glass. The polished surface blurred, and a moment later a man appeared, half-shaven and holding a razor in one hand.
'Sorry madam,' said the Mirror, hastily dropping the razor. 'Caught me a bit early this morning.'
'How are you, Mirror?' said the Wicked Queen, with her best smile.
'Oh, quite well, madam, quite well indeed,' he said, scrubbing the foam from his face with a square of towel. 'And your wicked self?'
'Well, Mirror, I've a new hat. What is your opinion?' She posed as she'd seen all the best models do, with her head slightly tilted and her plump red lips pursed in a pout.
'You look perfectly delicious, madam, as always. Were I not a mere humble Mirror...' He left the sentence unfinished as he dragged a shirt over his tousled head.
'And who is the fairest of them all?' It was her favourite question, and she asked it at least twice a day.
'I'm afraid Snow White is the fairest of them all, madam,' said the Mirror apologetically.
'M-my stepdaughter? Since when?'
'Since nine o'clock last night, madam, when the surveys came in. Saw them myself. Snow White's taken the lead by a 15% margin.'
Enraged, the Wicked Queen smashed her faithful Mirror. The broken pieces fell unheeded on the floor, and it was seven years before anybody could put them back together again.
The Wicked Queen was downcast for some days, and allowed nobody to enter her high tower room. At last she took from around her neck her prized necklace, from which hung a glittering jewelled apple.
The apple grew into plump lushness in her hands, sparkling invitingly in the light. She smiled, for though it appeared so innocently delicious, it was deeply poisonous. Any young, white-skinned black-haired maiden who might happen to bite into it (naming no names) would immediately fall into a deep sleep, from which she would never wake.
She wrapped it carefully in a beautiful box and addressed it to her sweet stepdaughter, Snow White. Inside she placed a note:
Dearest,
How is it that you have not been to see me in so long? In token of my love for you, find enclosed a gift. I know how much you have always loved apples.
Love,
W. Q.
***
Snow White lived in the woods, in a little cabin that she shared with her seven diminutive male friends. Her days were spent wandering the woodlands, collecting plump red berries and befriending the roaming animals of the wilds.
When the apple arrived, she and her seven friends were just sitting down to a meagre breakfast. It was winter and the woods were bare of food. The eyes of her seven friends lit up at the sight of the glorious apple, and before she could stop them they were passing it around among themselves, biting it to pieces.
She was dismayed at the fate of her glorious gift, until she observed that each friend stiffened and fell off his stool, lying on the rough wooden floor as if dead.
Snow White's eyes narrowed. She read the note again, and then, collecting her cloak, she left the cabin and walked quickly into the woods.
In a treehouse deep in the forest there lived a witch with whom Snow White was on very good terms. She knocked perfunctorily on the round wooden door, and stepped inside.
The Witch looked up from her knitting, fixing Snow White with a beady green eye. 'Well, dearie, what's it to be? I'm fresh out of laudanum if that's what you're wanting.'
Snow White slipped an arm affectionately around the craggy old woman's shoulders, explaining her plan in an undertone. The Witch cackled appreciatively and immediately spread out her tools.
Snow White waited for some hours, and at last the Witch's preparations were complete. She handed to Snow White two new apples: one as red and luscious as the first and filled with nothing but the sweetest of juices; the other green as grass and deathly poisonous.
'You be careful with that, dearie,' she said as Snow White stepped back into the darkening forest.
***
It was two days before the Wicked Queen received a reply to her note, and she was growing impatient. At last it arrived.
Dear Stepmother,
I acknowledge receipt of your generous gift and thank you for the same. It is such a beautiful fruit that I have decided to save it for my birthday feast, which is next Tuesday. I beg you will join me at my humble abode at six o'clock in the evening, where a banquet will be spread in our joint honour.
Yours etc,
S. W.
When the Queen arrived, Snow White had decorated the cabin very beautifully. She sat alone at one of the eight stools arranged around her humble table.
'Gracious, dear, where are your friends on this joyous occasion?'
'Gathering winter berries in the woods. Sit down, Stepmother. I've prepared a special treat for you: Green Apple Pie.' And from a cupboard Snow White produced a glorious pie, topped with the lightest of pastry and sprinkled with spices. From it arose the fresh scent of apples.
'Why, my dear, how generous,' said the Queen, eyeing the pie with hunger. For Snow White was not the only lady of the family with a weakness for sweet apple flesh.
'However,' she said, tearing her eyes away from the pie, 'It is your birthday, dearest. Shall you not enjoy your gift first?'
'Certainly, Stepmother,' said Snow White. She bit deeply into her red, red apple and the juices flowed down her chin.
'Quite delicious,' she said, calmly. Then her body stiffened, her eyes widened in shock, and she fell from her stool. There she lay as if dead, with the treacherous apple loosely clasped in her limp hand.
The Wicked Queen laughed to herself with satisfaction as Snow White lay motionless on the ground. 'NOW who is the fairest of them all?' she said smugly. She picked up the pie and left the cabin.
After she was gone, Snow White stirred from her apparently endless slumber and sat up, smiling.
***
The Queen was never again seen to enter the high castle on the hill that was her home. She was later found by travellers, resting asleep in a glass coffin in a clearing in the woods. Around her were arrayed seven smaller coffins: in each one lay a diminutive man, white as death.
The castle became Snow White's home. The Mirror was eventually restored, and it sang Queen Snow White's praises enthusiastically until the end of her days.
***-----------------------------------------------------------------------------------------------------***
The Artists (in order of appearance)
Allen Design Boutique features handmade home decor, including furniture, lighting artwork and accessories. http://www.etsy.com/shop/allendesign
NBBWear or Natural Born Beauties: makers of uniquely stylish hats, accessories and lingerie http://www.etsy.com/shop/NBBWEAR
Octoberstale makes beautiful fairytale jewellery. The Poisoned Apple necklace is one of several pieces currently available in their shop at http://www.etsy.com/shop/octoberstale
Slightclutter Photography offers signed prints of beautiful stills, often nature-themed. http://www.etsy.com/shop/slightclutter
Anitadrie offers prints of her quirky and colourful original illustrations. http://www.etsy.com/shop/anitadrie
LilacPumpkin specialises in whimsical creations both life size and in miniature, especially fairy or halloween themed: http://www.etsy.com/shop/Lilacpumpkin
gelDlights makes handmade scented art candles http://www.etsy.com/shop/gelDlights
The Artisan Maskers mostly create beautiful, dreamy masks. They also offer hats & a few fine art prints. http://www.etsy.com/shop/artisanmaskers
***-----------------------------------------------------------------------------------------------------***
Thank you for reading! The next story in the series will be The Truth About Red Riding Hood. Got an item to recommend for a feature? Let me know!
To begin with.... The Truth About Snow White.
***-----------------------------------------------------------------------------------------------------***
Once Upon a Time there was a fair and beauteous land, ruled over by a fair and beauteous Wicked Queen. Nobody loved this damsel so well as she loved herself, and her only companion was her Magic Mirror.
 |
| Allen Design Boutique |
It happened one day that the Wicked Queen had a new hat. It was a remarkable piece: as black as ebony and as shadowy as the night, its unique style was perfectly suited to the display of her particular personal qualities.
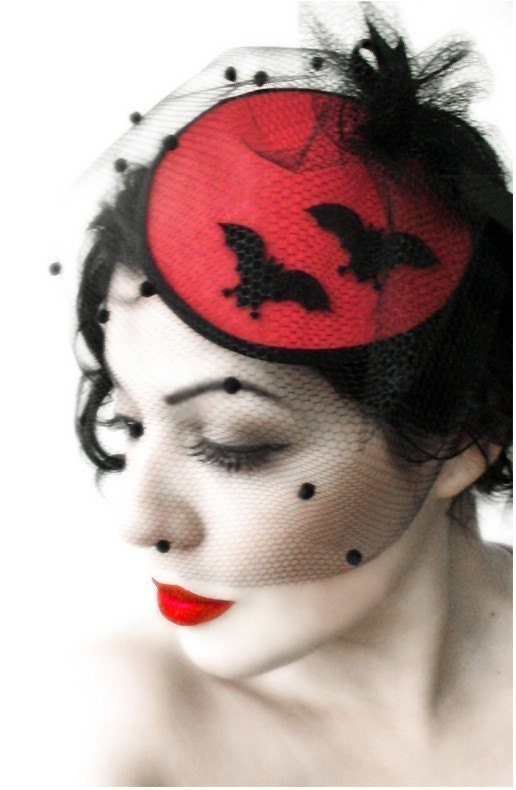 |
| NBBWear |
Thus arrayed, she presented herself before the Mirror and tapped lightly on the glass. The polished surface blurred, and a moment later a man appeared, half-shaven and holding a razor in one hand.
'Sorry madam,' said the Mirror, hastily dropping the razor. 'Caught me a bit early this morning.'
'How are you, Mirror?' said the Wicked Queen, with her best smile.
'Oh, quite well, madam, quite well indeed,' he said, scrubbing the foam from his face with a square of towel. 'And your wicked self?'
'Well, Mirror, I've a new hat. What is your opinion?' She posed as she'd seen all the best models do, with her head slightly tilted and her plump red lips pursed in a pout.
'You look perfectly delicious, madam, as always. Were I not a mere humble Mirror...' He left the sentence unfinished as he dragged a shirt over his tousled head.
'And who is the fairest of them all?' It was her favourite question, and she asked it at least twice a day.
'I'm afraid Snow White is the fairest of them all, madam,' said the Mirror apologetically.
'M-my stepdaughter? Since when?'
'Since nine o'clock last night, madam, when the surveys came in. Saw them myself. Snow White's taken the lead by a 15% margin.'
Enraged, the Wicked Queen smashed her faithful Mirror. The broken pieces fell unheeded on the floor, and it was seven years before anybody could put them back together again.
The Wicked Queen was downcast for some days, and allowed nobody to enter her high tower room. At last she took from around her neck her prized necklace, from which hung a glittering jewelled apple.
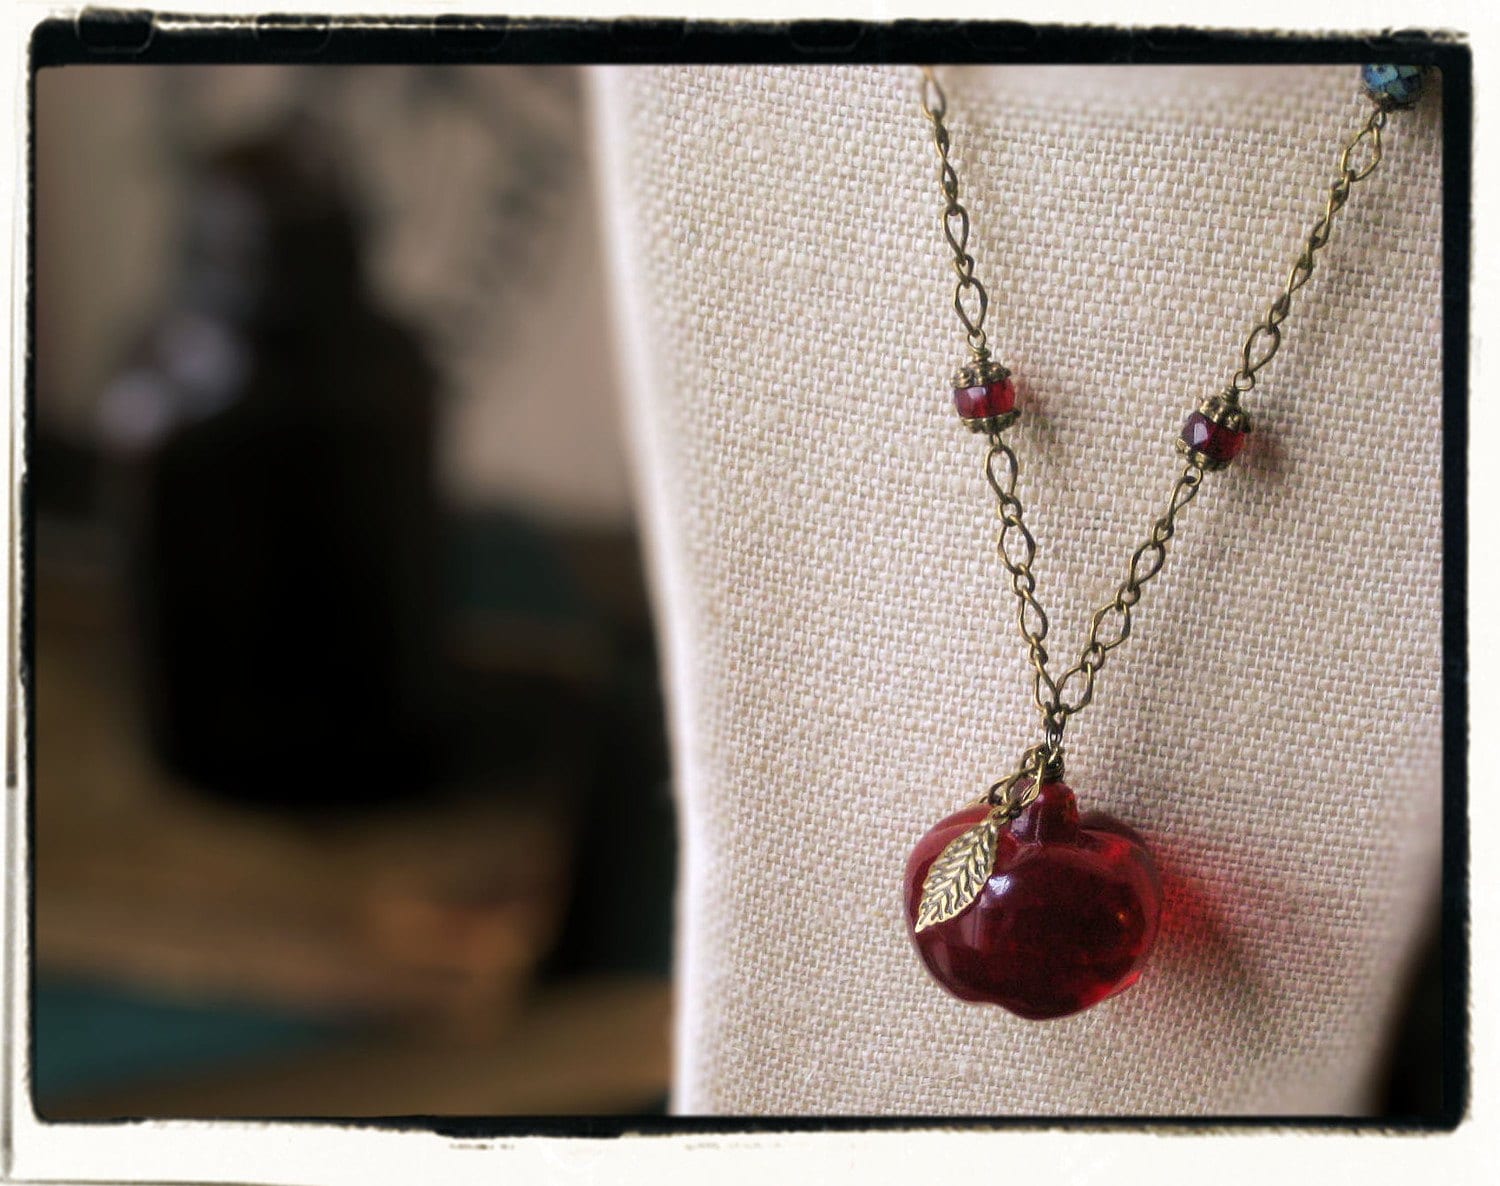 |
| Octoberstale |
She wrapped it carefully in a beautiful box and addressed it to her sweet stepdaughter, Snow White. Inside she placed a note:
Dearest,
How is it that you have not been to see me in so long? In token of my love for you, find enclosed a gift. I know how much you have always loved apples.
Love,
W. Q.
***
Snow White lived in the woods, in a little cabin that she shared with her seven diminutive male friends. Her days were spent wandering the woodlands, collecting plump red berries and befriending the roaming animals of the wilds.
 |
| Slightclutter Photography |
When the apple arrived, she and her seven friends were just sitting down to a meagre breakfast. It was winter and the woods were bare of food. The eyes of her seven friends lit up at the sight of the glorious apple, and before she could stop them they were passing it around among themselves, biting it to pieces.
She was dismayed at the fate of her glorious gift, until she observed that each friend stiffened and fell off his stool, lying on the rough wooden floor as if dead.
Snow White's eyes narrowed. She read the note again, and then, collecting her cloak, she left the cabin and walked quickly into the woods.
In a treehouse deep in the forest there lived a witch with whom Snow White was on very good terms. She knocked perfunctorily on the round wooden door, and stepped inside.
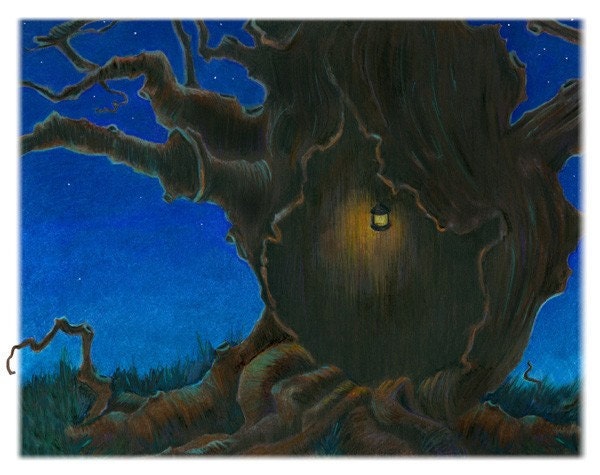 |
| Anitadrie |
The Witch looked up from her knitting, fixing Snow White with a beady green eye. 'Well, dearie, what's it to be? I'm fresh out of laudanum if that's what you're wanting.'
Snow White slipped an arm affectionately around the craggy old woman's shoulders, explaining her plan in an undertone. The Witch cackled appreciatively and immediately spread out her tools.
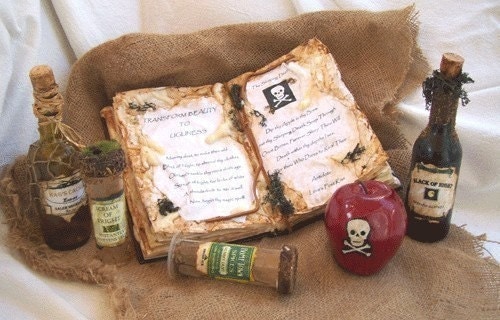 |
| LilacPumpkin |
Snow White waited for some hours, and at last the Witch's preparations were complete. She handed to Snow White two new apples: one as red and luscious as the first and filled with nothing but the sweetest of juices; the other green as grass and deathly poisonous.
'You be careful with that, dearie,' she said as Snow White stepped back into the darkening forest.
***
It was two days before the Wicked Queen received a reply to her note, and she was growing impatient. At last it arrived.
Dear Stepmother,
I acknowledge receipt of your generous gift and thank you for the same. It is such a beautiful fruit that I have decided to save it for my birthday feast, which is next Tuesday. I beg you will join me at my humble abode at six o'clock in the evening, where a banquet will be spread in our joint honour.
Yours etc,
S. W.
When the Queen arrived, Snow White had decorated the cabin very beautifully. She sat alone at one of the eight stools arranged around her humble table.
'Gracious, dear, where are your friends on this joyous occasion?'
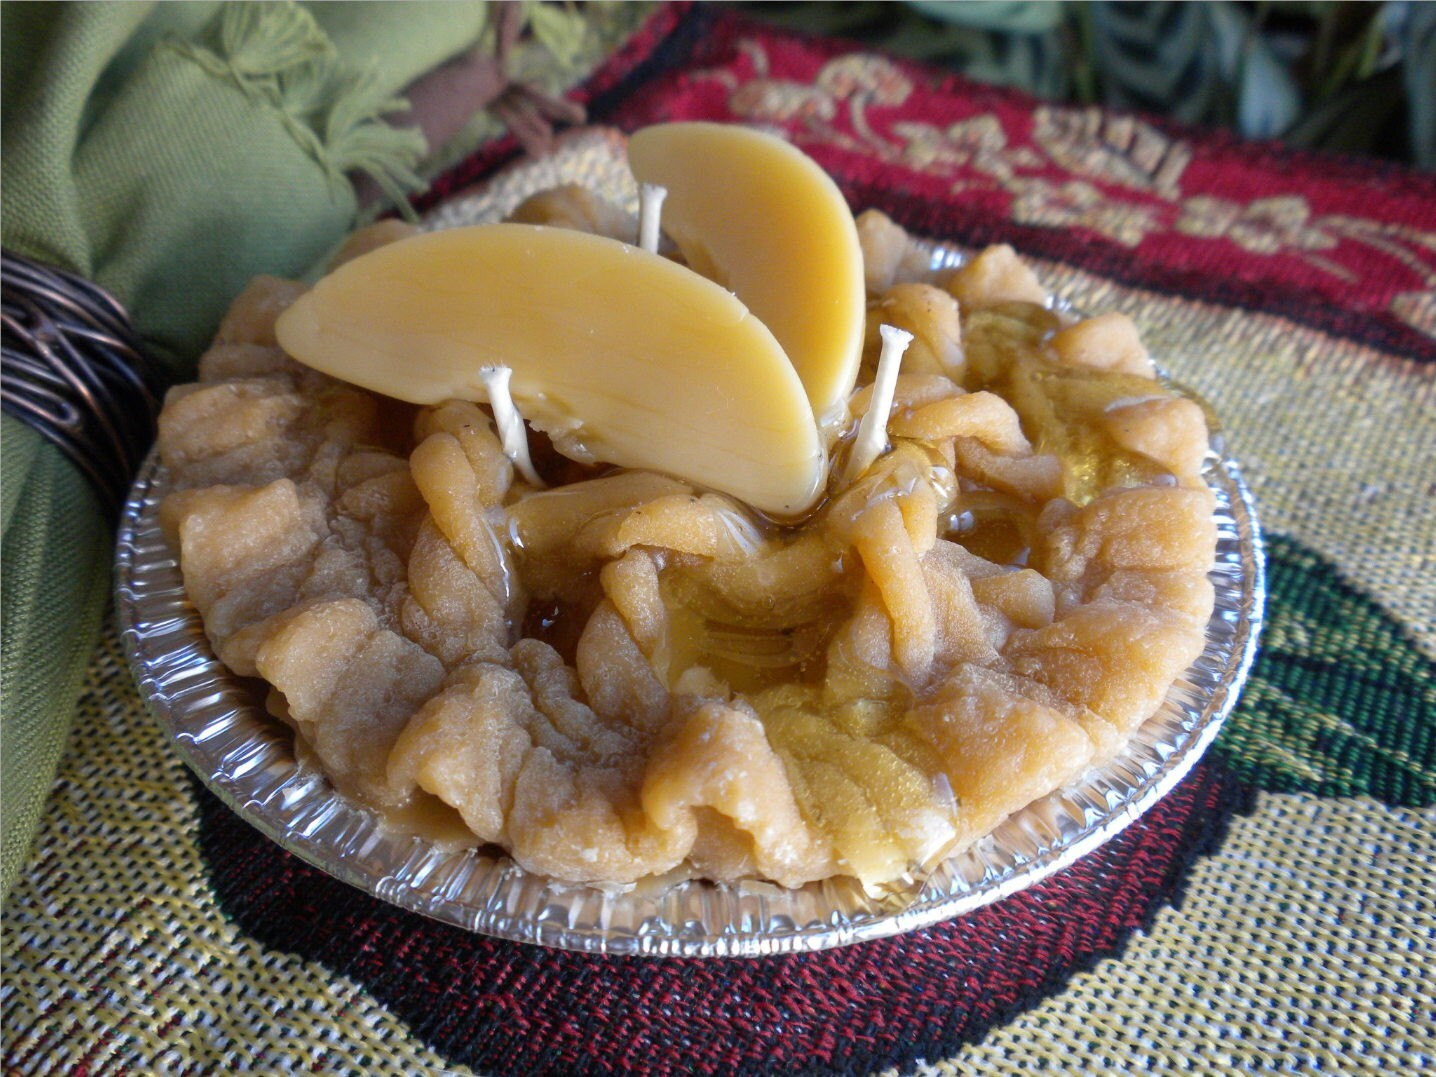
'Gathering winter berries in the woods. Sit down, Stepmother. I've prepared a special treat for you: Green Apple Pie.' And from a cupboard Snow White produced a glorious pie, topped with the lightest of pastry and sprinkled with spices. From it arose the fresh scent of apples.
 |
gelDlights |
'Why, my dear, how generous,' said the Queen, eyeing the pie with hunger. For Snow White was not the only lady of the family with a weakness for sweet apple flesh.
'However,' she said, tearing her eyes away from the pie, 'It is your birthday, dearest. Shall you not enjoy your gift first?'
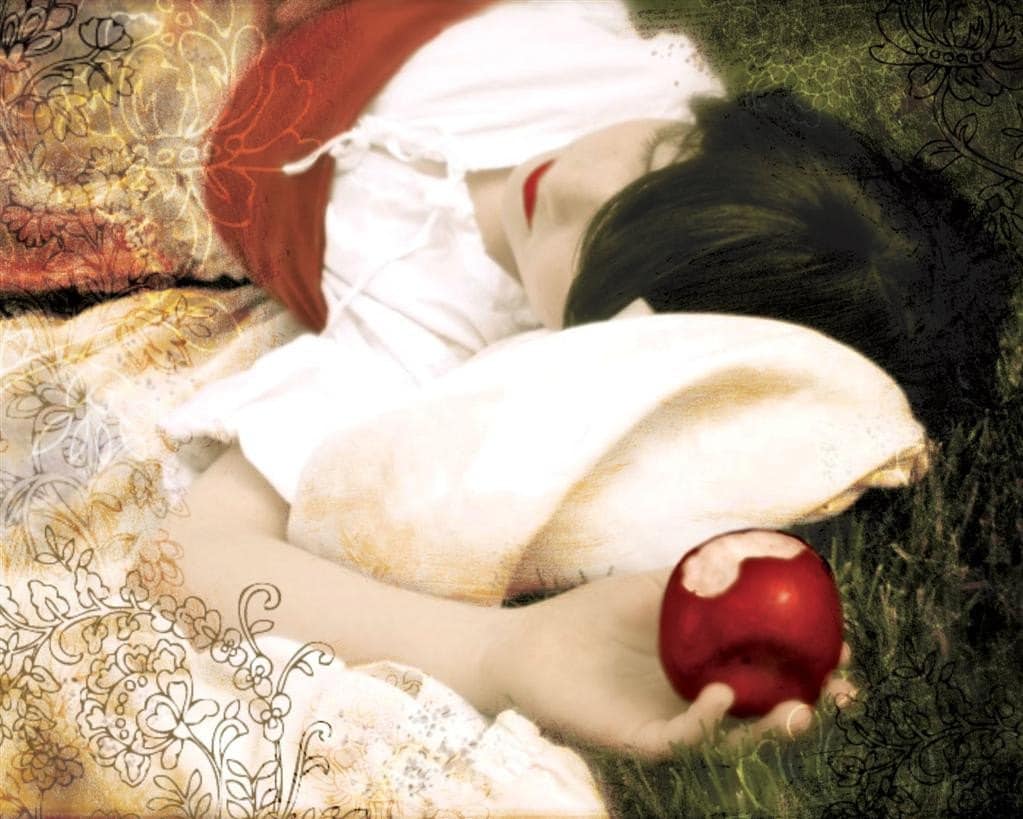
'Certainly, Stepmother,' said Snow White. She bit deeply into her red, red apple and the juices flowed down her chin.
'Quite delicious,' she said, calmly. Then her body stiffened, her eyes widened in shock, and she fell from her stool. There she lay as if dead, with the treacherous apple loosely clasped in her limp hand.
 |
| Artisan Maskers |
After she was gone, Snow White stirred from her apparently endless slumber and sat up, smiling.
***
The Queen was never again seen to enter the high castle on the hill that was her home. She was later found by travellers, resting asleep in a glass coffin in a clearing in the woods. Around her were arrayed seven smaller coffins: in each one lay a diminutive man, white as death.
The castle became Snow White's home. The Mirror was eventually restored, and it sang Queen Snow White's praises enthusiastically until the end of her days.
***-----------------------------------------------------------------------------------------------------***
The Artists (in order of appearance)
Allen Design Boutique features handmade home decor, including furniture, lighting artwork and accessories. http://www.etsy.com/shop/allendesign
NBBWear or Natural Born Beauties: makers of uniquely stylish hats, accessories and lingerie http://www.etsy.com/shop/NBBWEAR
Octoberstale makes beautiful fairytale jewellery. The Poisoned Apple necklace is one of several pieces currently available in their shop at http://www.etsy.com/shop/octoberstale
Slightclutter Photography offers signed prints of beautiful stills, often nature-themed. http://www.etsy.com/shop/slightclutter
Anitadrie offers prints of her quirky and colourful original illustrations. http://www.etsy.com/shop/anitadrie
LilacPumpkin specialises in whimsical creations both life size and in miniature, especially fairy or halloween themed: http://www.etsy.com/shop/Lilacpumpkin
gelDlights makes handmade scented art candles http://www.etsy.com/shop/gelDlights
The Artisan Maskers mostly create beautiful, dreamy masks. They also offer hats & a few fine art prints. http://www.etsy.com/shop/artisanmaskers
***-----------------------------------------------------------------------------------------------------***
Thank you for reading! The next story in the series will be The Truth About Red Riding Hood. Got an item to recommend for a feature? Let me know!
Friday, March 11, 2011
The Influence of History
I've said in various places that I quite often draw ideas and inspiration from history. I've always been interested in historical costume, and I recently finished a degree in Heritage Studies which drew out that interest even more.
What this actually means for my work is variable. One of the first designs I created (in fact, thinking about it, the very first design I created) was my red velvet cape, which is proving to be agreeably popular. This idea was originally inspired by some of the beautiful half-length velvet/velour cloaks popular among ladies in the nineteenth century.
Here's a fashion plate from the November 1854 edition of La Belle Assemblee.
Being me, I naturally couldn't just recreate one of those (though maybe I will someday: they are delicious). I had to give it a fairytale twist. I created a shorter version with a tapered hem - because it looks pretty, and it leaves the arms free. And, of course, I put an enormous hood on it.
The end product doesn't look much like the above, but that's the nature of inspiration.
More recently I have been drawing from eighteenth century fashions, and specifically the technique known as 'polonaise'. Here's a photo of a gown currently in the V&A, London:
'Polonaise' refers to the method of pulling and tucking up the fabric of the overskirt into those pretty gathered layers. The lovely thing about this technique is that it looks very beautiful and sophisticated, but it's really quite simple to create.
It consists of tapes or ribbons sewn into the waistband of the skirt. Loops of thread are stitched inside the skirt at intervals down to the hem, and the tapes are threaded through these loops. Then simply use the tape like a drawstring, pulling the fabric up into gathers, and secure the end at the waistband once you're happy with the arrangement. Easy, but no one'd guess that from looking at a gown like this!
Here's the use I've made of it this week:
I've been experimenting with creating fairytale skirts for a few months now. This new interpretation retains the asymmetrical handkerchief hem of earlier designs, with a polonaise skirt over the top.
I've embellished it with the embroidered leaf trinkets I was working on last week. The effect is much more elaborate than my other designs: I think this calf-length style is destined for a ballroom. I'll be creating a similar skirt in sea-green, dark silver and white twinkle tulle next week.
Thursday, March 3, 2011
Making fabric charms and trinkets
I've been working on a new idea this week. I want something unique to decorate my fairy skirts with, so I've been experimenting with creating embroidered fabric charms.
I cut a shape out of a piece of felt, sandwiched this between two layers of lighter fabric (in this case cotton on one side and taffeta on the other), and then satin stitched around the edge. Since I'm doing a brown-hued, autumn-themed skirt next, I began with a leaf shape in shades of brown.
The experiment's been successful enough to be worth repeating. I'm planning to attach this one of the ribbon-ends of the drawstring on the upcoming skirt, with a cluster of gold bells. Another idea is to make star shapes with some of those beautiful little twinkling hotfix gems. Possibilties galore!
I also made a new treasury on Etsy today, my third. It's not fantasy themed or fairytale themed, but feline themed (it begins with 'f', so it counts, right?).
...and sleeping it off afterwards.Feline fun: because I miss my cats.
I cut a shape out of a piece of felt, sandwiched this between two layers of lighter fabric (in this case cotton on one side and taffeta on the other), and then satin stitched around the edge. Since I'm doing a brown-hued, autumn-themed skirt next, I began with a leaf shape in shades of brown.
Here's the taffeta side. I chose some warmer, brighter colours for the embroidery:
The experiment's been successful enough to be worth repeating. I'm planning to attach this one of the ribbon-ends of the drawstring on the upcoming skirt, with a cluster of gold bells. Another idea is to make star shapes with some of those beautiful little twinkling hotfix gems. Possibilties galore!
I also made a new treasury on Etsy today, my third. It's not fantasy themed or fairytale themed, but feline themed (it begins with 'f', so it counts, right?).
'Cats Behaving Badly...' by ChaelenDesigns
...and sleeping it off afterwards.Feline fun: because I miss my cats.
 Clockwork Kitty Steampu... $6.99 |  Fluffy's diet by Ma... $15.00 |  Vintage Cat Tags- Digit... $3.75 |
 Cat Art / Free Ice Crea... $17.00 |  A playful little kitten... $25.00 |  This Is My Pumpkin 8x10... $25.00 |
 Catch of the Day Dichro... $25.00 | 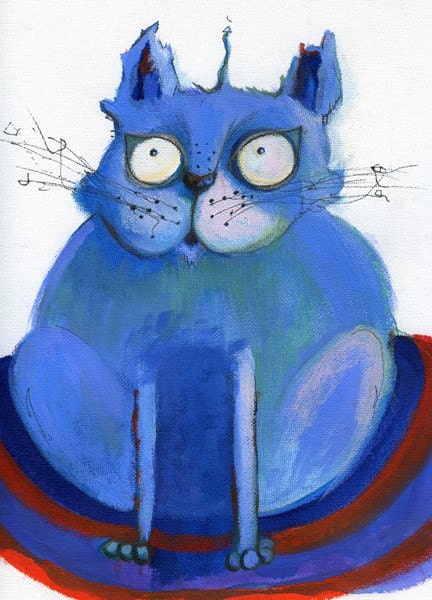 Bomb $ | 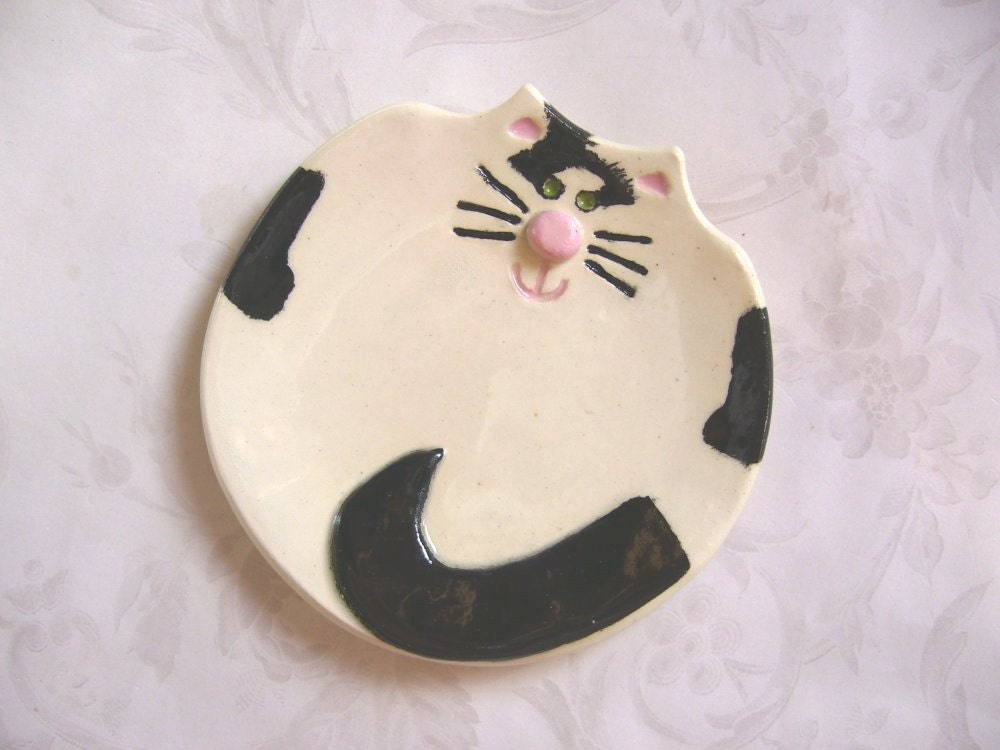 Meet "Baby" T... $11.00 |
 Original 3.5x5 Painting... $50.00 |  Sleeping Cat Disc Penda... $15.00 |  Fairy Cat Cameo with Ke... $24.00 |
 Orange Tabby Cat Signed... $36.00 |  PLACE AN ORDER for a Sl... $32.00 |  Keeping Up Appearances ... $200.00 |
 Crochet doll amigurumi ... $4.00 |
Treasury tool is sponsored by Lazzia.com A/B image testing.
Tuesday, March 1, 2011
The Fabric Markets of Amsterdam
![Albert Cuyp [© B. Liefting]](http://www.amsterdamhotspots.nl/images/spots/albertcuyp.jpg)
I spent a bit of time in Holland lately, and of course I made a point of going to Albert Cuyp street. There is an enormous day market there, selling just about everything imaginable. The most interesting parts, to me, were the fabric shops (of course!) - many of them, and most of them are enormous and extremely well-stocked.
I bought some new lengths of taffeta in extremely pretty colours, along with some cottons. Luckily they survived the experience of being determinedly squashed into my luggage to come home to England with me. I acquired crinkled taffeta in teal, dark silver and coppery-brown, plus some dark red and mid-purple cotton. Added to my existing fabric stocks, I find I have enough to make some fairy skirts in wholly new colour combinations. So that's my project for this week!
I've also resolved on searching out some beads, trinkets, bells, new ribbons and charms to decorate them with. Especially bells. What could be better than a fairy skirt with its own accompaniment of tinkling fairy music?
Friday, February 4, 2011
Butterflies and Whimsy
News today, twice over.
I have made my first treasury on Etsy. Naturally I chose fantasy and fairytale as a theme. It is visible to the right of this post, if you scroll down a little - have a peek! It is full of deliciousness.
The waist cincher I spoke of before was completed today, in addition, and listed in the shop. Here's a picture.
In honour of Spring, which I really hope is soon to come!
Next I'm veering back in the direction of historical-influenced designs and working up a reticule. A Regency reticule, that is, though naturally I will give it a bit of a fairytale twist!
Friday, January 28, 2011
About that bodice...
I've had a new design in progress for the last few weeks. At last, one has been created to meet my exacting standards of perfection and added to the shop.
I chose black velvet for this one, with silver eyelets and either black or dark red ribbons. Alas, I have no more of that type of fabric and I can't buy it at the moment; whether this bodice turns out to be a one-off remains to be seen.
I chose black velvet for this one, with silver eyelets and either black or dark red ribbons. Alas, I have no more of that type of fabric and I can't buy it at the moment; whether this bodice turns out to be a one-off remains to be seen.
Its layered structure was tricky and rather time-consuming to create properly. Under that velvet lies thick cotton drill for strength, stitched with many lengths of rigilene boning. Behind that is a black cotton lining. The eyelets must be placed with care to avoid damaging the front panels. Everything is neatened and secured to an almost obsessive degree... as usual. And top-stitched. Long-winded for such an apparently small, simple item, wouldn't you say?
Anyways, I intend to make more of these in the near future. First, though, I'm going back to properly developing my waist cincher pattern, and creating one to be listed. The prototype for this design can be seen in the shop, worn with the blue/purple taffeta fairy skirt. Next week I'll be making one from a piece of gorgeous blue/purple/gold butterfly-printed cotton that I have. Let's hope it all goes well; if so it will make my 8th shop listing. Huzzah!
Thursday, January 27, 2011
Migration
Dear friends,
Much as I love Wordpress, it appears that blogspot is the better option for this kind of blog. Henceforth, then, 'Capery Drapery' of Wordpress shall be no more; we shall party over here instead!
Much as I love Wordpress, it appears that blogspot is the better option for this kind of blog. Henceforth, then, 'Capery Drapery' of Wordpress shall be no more; we shall party over here instead!
Subscribe to:
Comments (Atom)


